COINSTAC First Example
An example for beginning COINSTAC computation creators.
Introduction to COINSTAC
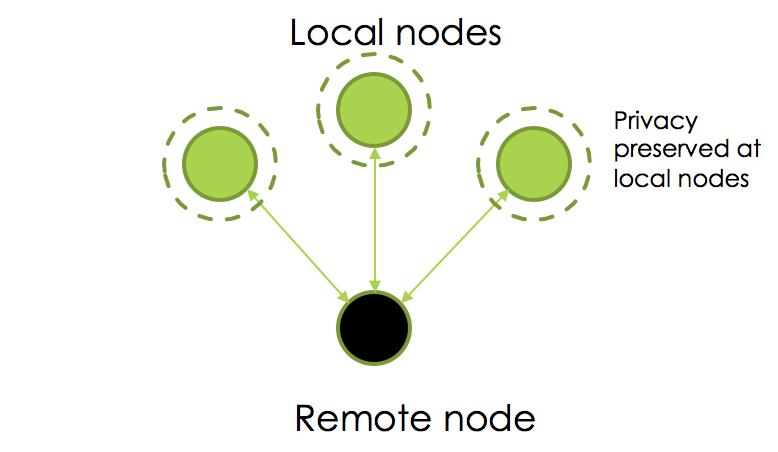
COINSTAC is a platform for running decentralized analyses. Users can enjoy the benefits of collaboration and data sharing while keeping their data on their own computers. The system consists of one or more client/local nodes and one remote node, which serves as an aggregator of results from the local nodes.

COINSTAC Simulator
This example makes use of the COINSTAC simulator, a command-line tool that computation creators can use to test that their computations will work with COINSTAC. It provides a testing interface for computation creators without all the baggage of the full application.
Summary of This Computation
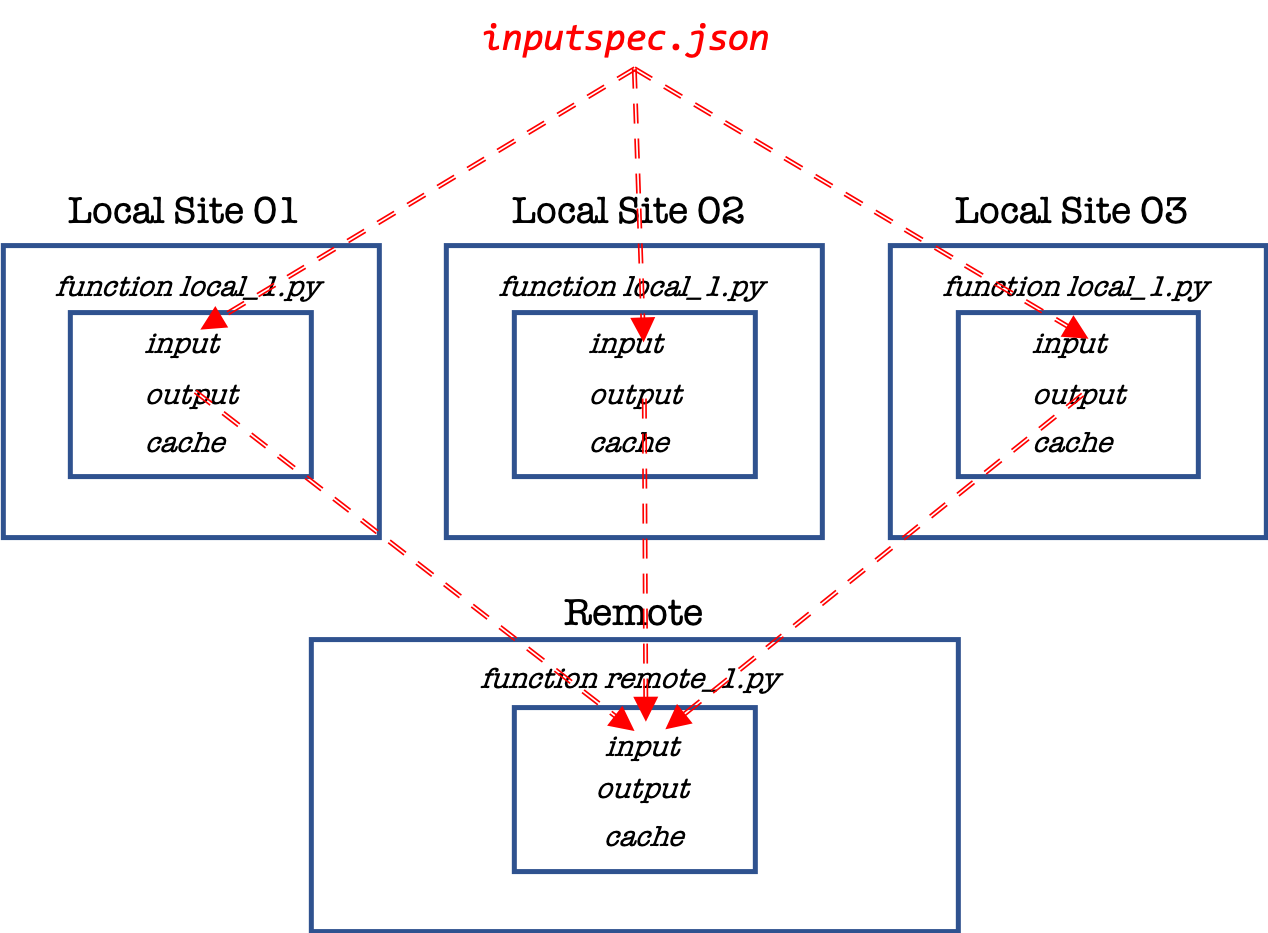
In this repo, we demonstrate a simple example of finding the average of three scalars (i.e., we are assuming three local sites). At each site, the scalar is read from a file, which is then sent to the remote/aggregator, where the average of the sites is computed and displayed.
Note: The use case of reading scalars from a file has been chosen to because it is an important aspect of most computations that are written for the COINSTAC architecture.
Requirements
- Latest version of node.js
- Test 1:
npm -v - Test 2:
node -v
- Test 1:
- Latest version of docker
- Test:
docker --version
- Test:
- Latest version of coinstac-simulator
- Installation:
sudo npm i -g coinstac-simulator - Test:
coinstac-simulator --version
- Installation:
Caveats: (Installation on Linux Distributions)
Usage
- Clone this repository:\
git clone https://github.com/mrn-code/coinstac-first-example - Change directory:\
cd coinstac-first-example - Build the Docker image (Docker must be running):\
docker build -t avg_test . - Run the code:\
coinstac-simulator
Getting Started
To successfully run a computation in the simulator we need to do the following:
Writing the Computation Specification
The computation specification (compspec.json) is a JSON document detailing how the COINSTAC application interacts with the computation. This includes controlling the computation by providing necessary metadata, providing inputs, using outputs, and composing the computation with other computations.
A more thorough treatment of the computation specification can be found here.
The computation specification for this example can be found here.
Writing the Input Specification

The input specification (inputspec.json) is a JSON document containing the inputs that are sent to the local sites during a simulator run. The contents of inputspec.json for this example computation with three local sites are as follows:
[{"covariates": {"value": "value0.txt"}},
{"covariates": {"value": "value1.txt"}},
{"covariates": {"value": "value2.txt"}}]
Note that this is an array of size three, corresponding to three local sites. Consider the first line:
{"covariates": {"value": "value0.txt"}}
This line indicates to the local.py script the file "value0.txt" from which the scalar is read.
When the computation begins in the simulator, the first local site receives input generated by this line. This is in the form of an argument for the "command" listed in the computation specification, like so:
$ python computation/local.py {"input":{"covariates": "value0.txt"}, "cache": {}, state: ...}
Likewise, the second and third local sites receive covariates from the corresponding elements from the array in the input specification (containing "value1.txt" and "value2.txt", respectively).
NOTE: Notice the presence of “value” key in inputspec.json. When this input is provided to the local function, you can see that the “value” key is not used. This is a convention used by the COINSTAC application.
Writing the Main Code
To create a computation for COINSTAC, you must write code that is executed on the local and remote nodes. This code can be written in any programming language, but Python is the most common language used. For a computation written in Python, the code that is to be run on a local site is called local.py, and the code that is to be run on the remote site is called remote.py. This is by convention; any names can be used as long as they are listed in the computation specification under "command." Note the use of python /computation/local.py and python /computation/remote.py in compspec.json.
The current COINSTAC architecture assumes that all computations start at the local node. COINSTAC simulator is a sequence of python calls to local.py and remote.py with the output of one function call fed as an input to the next function call in the form of a command-line arguments.
The application communicates with the computation via standard input (stdin) and standard output (stdout). Note that these are used for I/O in local.py
Writing the Dockerfile
To run your computation in COINSTAC, you'll need to encapsulate it in a docker image. For now, we have one base Python 3.6 image that all computations must inherit from. The Dockerfile uses that image as a base, places your code into the /computation folder, and performs installation of dependencies required by your code, as specified in requirements.txt
Note: Please ignore any test or extraneous files by using a .dockerignore file. This keeps the image small, which improves the performance of the build.
# python version
FROM python:3.7.8
# Set the working directory
WORKDIR /computation
# Copy the current directory contents into the container
COPY requirements.txt /computation
# Install any needed packages specified in requirements.txt
RUN pip install -r requirements.txt
# Copy the current directory contents into the container
COPY . /computation
Explanation of Dockerfile Contents:
FROM python:3.7.8- This establishes that the computation is running python code and sets the working version
WORKDIR /computation- This is the working directory where your computation scripts are called.
- need to explain the other lines in the code but have to test something before I do that
Setting up the Test Data
In order to successfully test a computation in the coinstac-simulator application, you must create a test folder that contains the input specification and test data for each local site.
One quick look at the structure of the current computation using the tree command will yield the following:
.
├── Dockerfile
├── README.md
├── ancillary.py
├── compspec.json
├── local.py
├── remote.py
├── requirements.txt
└── test
    ├── inputspec.json
    ├── local0
    │   └── simulatorRun
    │       └── value0.txt
    ├── local1
    │   └── simulatorRun
    │       └── value1.txt
    ├── local2
        └── simulatorRun
            └── value2.txt
Notice the presence of test/local#/simulatorRun/value#.txt. The computation author should manually create a local#/simulatorRun inside the test directory for each local client.
Note: By now, you should realize that the number of folders you create should match the array size as specified inputspec.json. The contents therein can be accessed only from that particular client and no one else.
Folders named cache, output and remote will be created at when the computation in run with coinstac-simulator as well.
Behind the Scenes
- In the current scenario, the output from local.py at local client will look as follows:
- At client 1: \
{ "output": { "output_val": 5, "computation_phase": 'local_1' } } - At client 2: \
{ "output": { "output_val": 5, "computation_phase": 'local_1' } } - At client 3: \
{
       "output": {
           "output_val": 5,
           "computation_phase": 'local_1'
       }
   }
- At client 1: \
- The input at remote.py, which is an aggregation of outputs from all the local clients, will look as follows:
{'input': {'local0': {'output_val': [5], 'computation_phase': 'local_1'}, 'local1': {'output_val': [6], 'computation_phase': 'local_1'}, 'local2': {'output_val': [7], 'computation_phase': 'local_1'}}, 'cache': {}, 'state': ....- Note, how the outputs from each local client are wrapped into a dictionary with the client ID being the key and sent in as an input to the remote node.
Without getting into the details, we point the reader/computation author to the use of the function
list_recursivefrom ancillary.py to determine the next function that should be invoked at the local/remote node having previously returned from a remote/local node.Also, notice the use of
args["state"]["baseDirectory"], which points totest/local#/simulatorRun.